Layout: New Here 1
Steps Overview
- Locate the New Here Template #1
- Title the Template
- Edit the Welcome Section
- Edit the Service Times Section
- Edit the Service Detail Section
- Add Your Church Location
- Edit the Expect Section
- Edit the Connect Detail Section
- Publish The Article
Template Overview
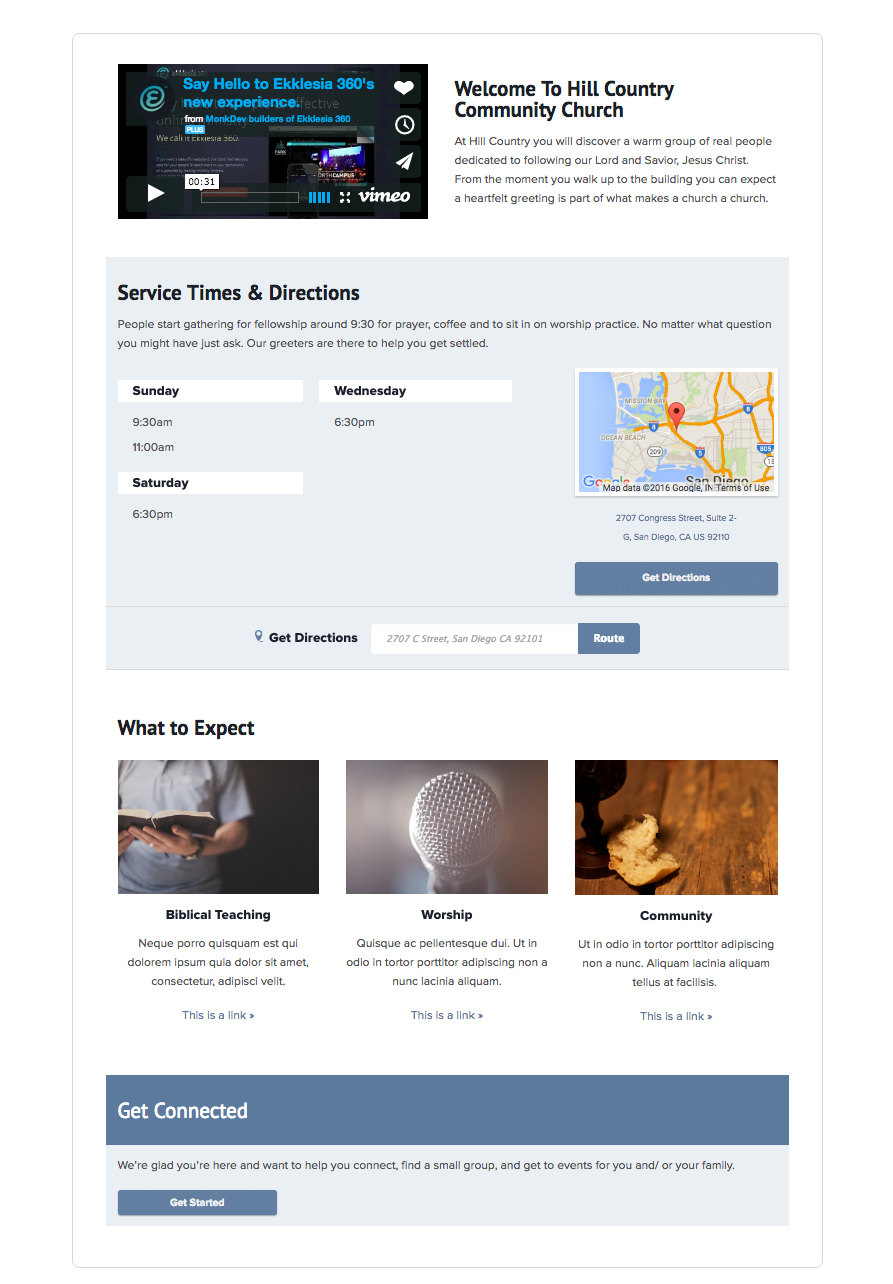
The New Here layout #1 is specifically designed to help you welcome new visitors. You can add information about what your church believes, directions, services times, and ways to get connected on a Sunday morning with events or programs during someone’s first visit.
Before You Get Started
Your implementor should have built & added the New Here Layout #1 to your site for you.
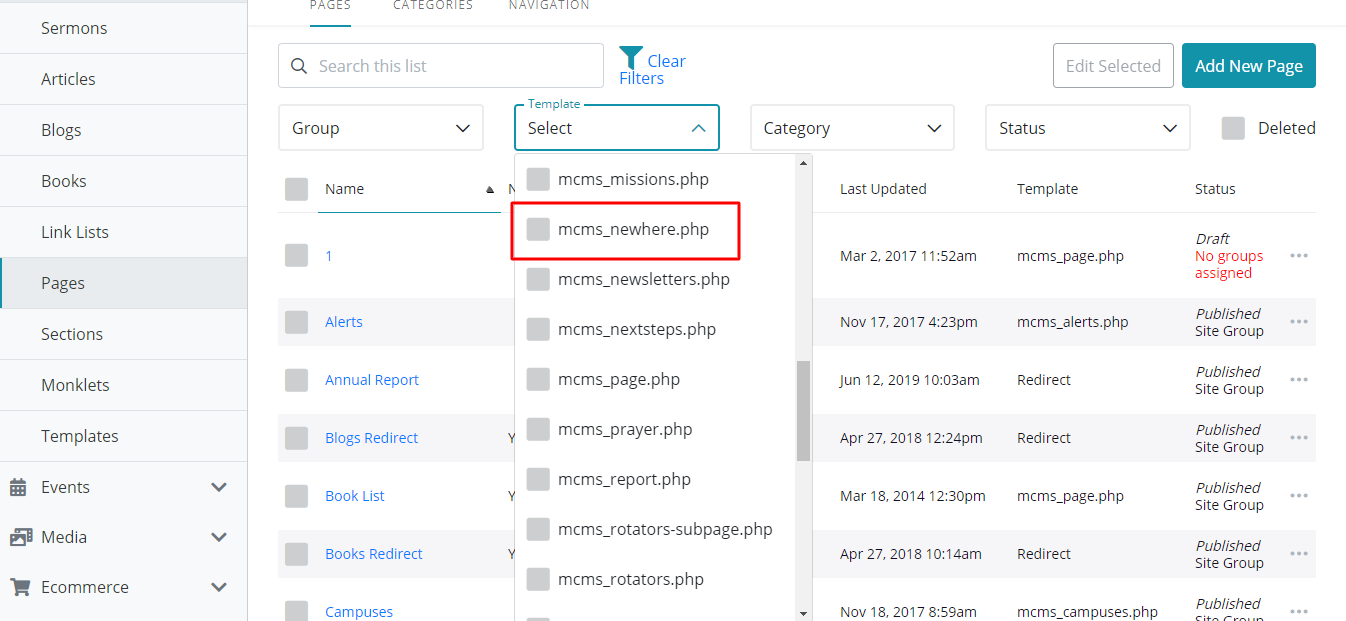
1. Locate your New Here Template by going to Content > Pages. If you can’t easily find the template, use the Template Filter.
Title & Header Image
Here is what your New Here #1 Template looks like when editing.
- Title the Template
- Add a Header Image
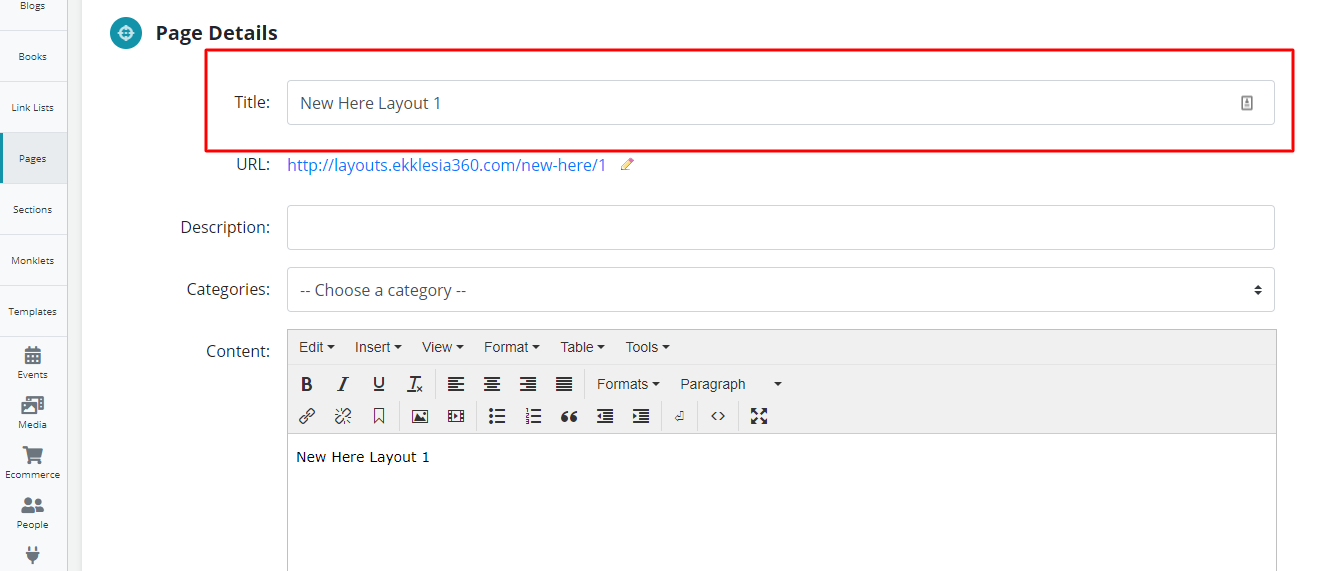
TITLE: The name indicated in the Title field will display at the top of your page.
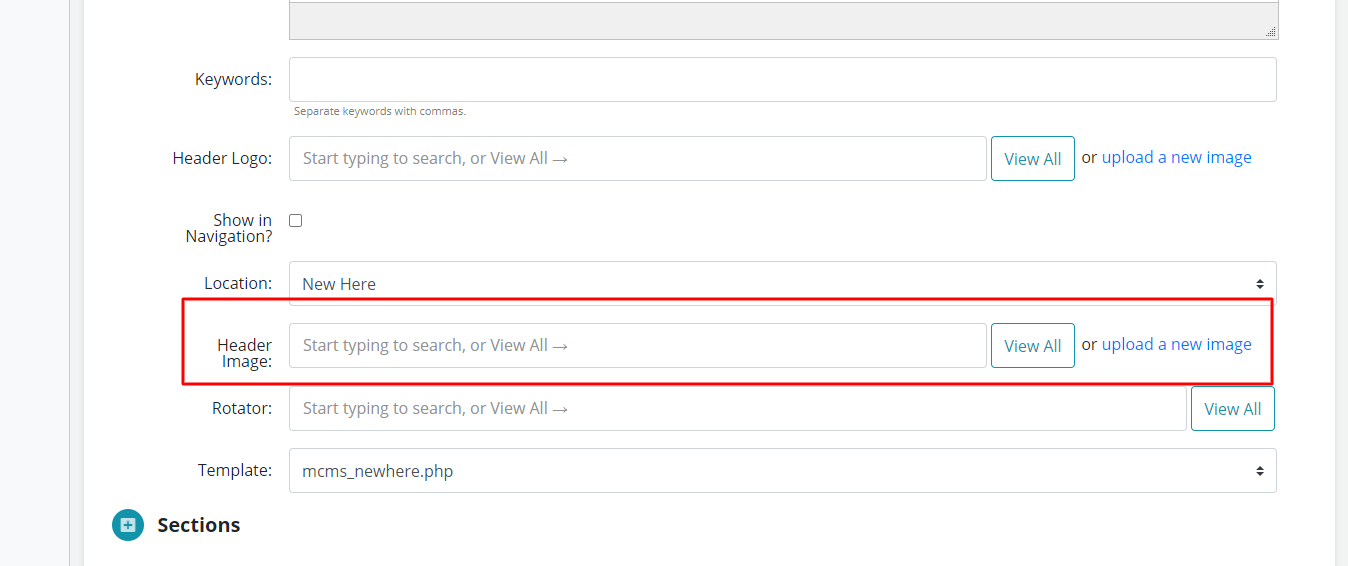
HEADER IMAGE: This image will appear at the top of your page (optional).
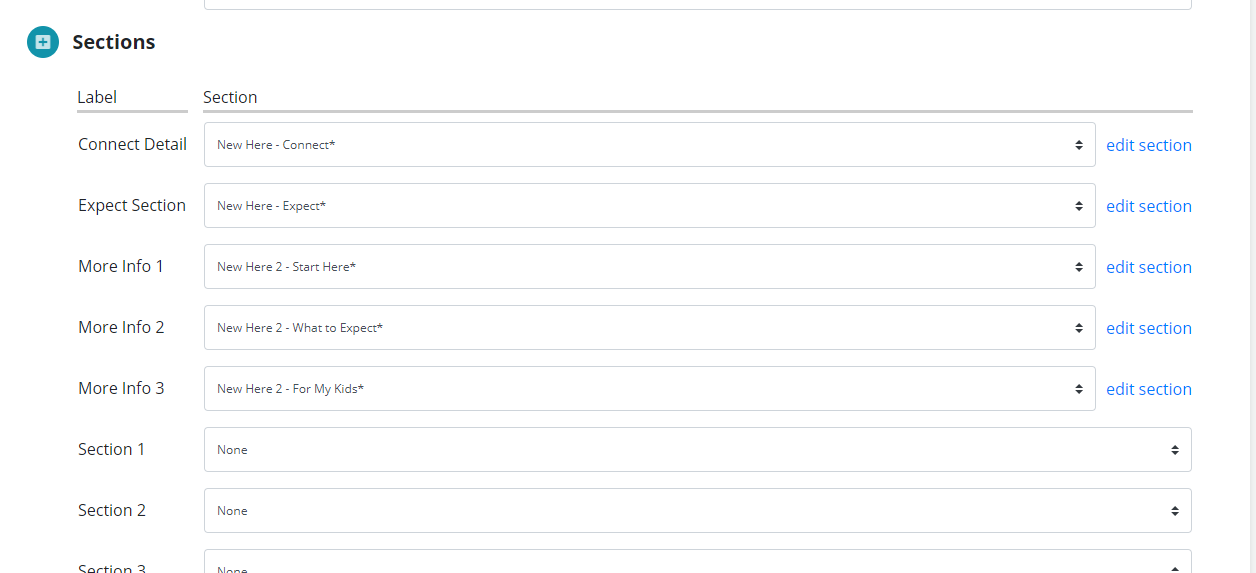
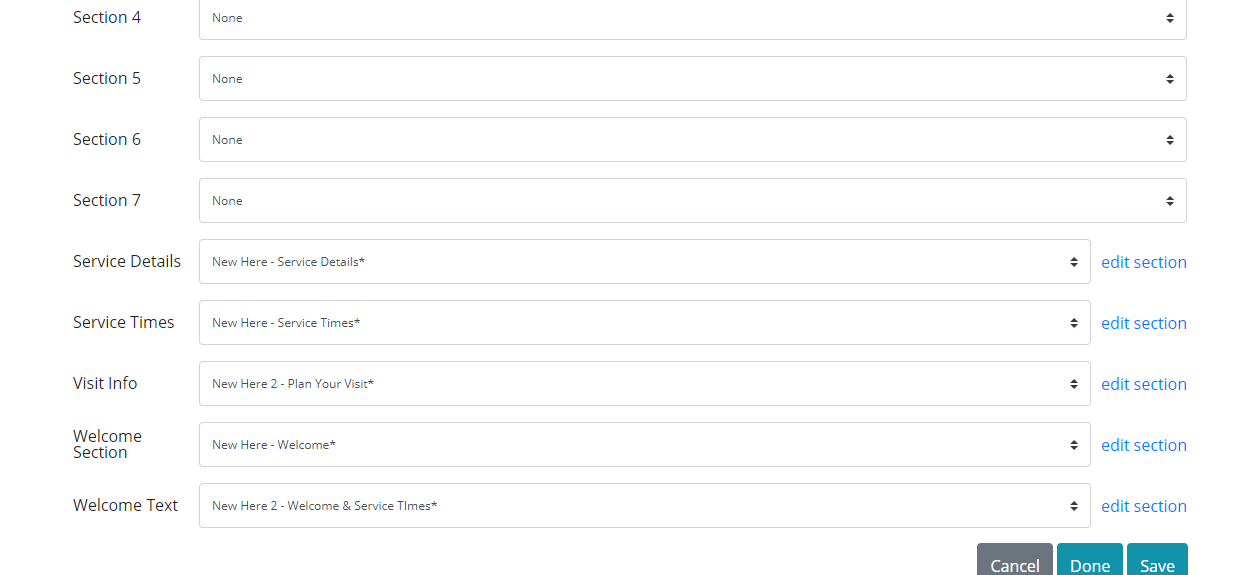
Before Editing Your Template: Sections
Your template is built in sections that you can edit. You template contains the following sections:
- Connect Detail
- Expect Section
- Service Details
- Welcome Section
All edits to this template are made in the Sections module.
More info on using Sections can be found on our Help Site: http://help.ekklesia360.com/article/sections/
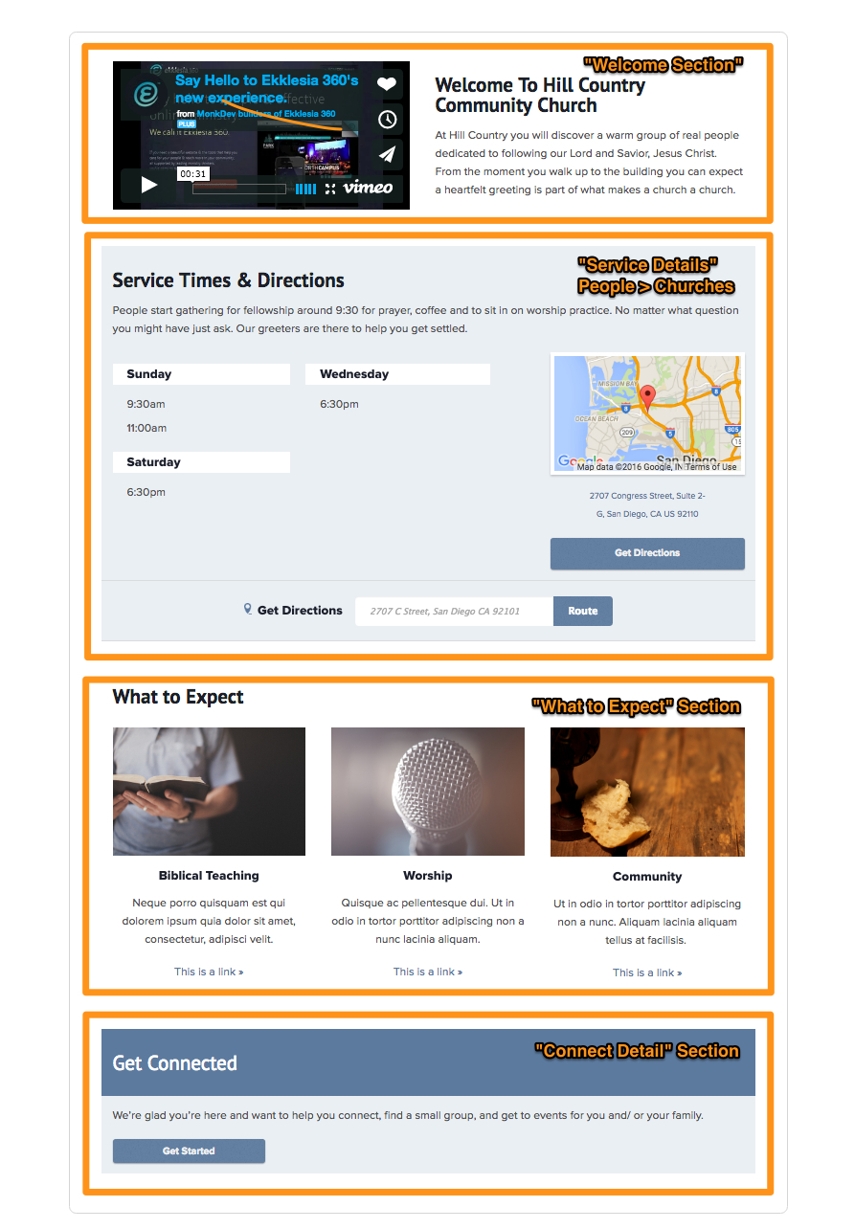
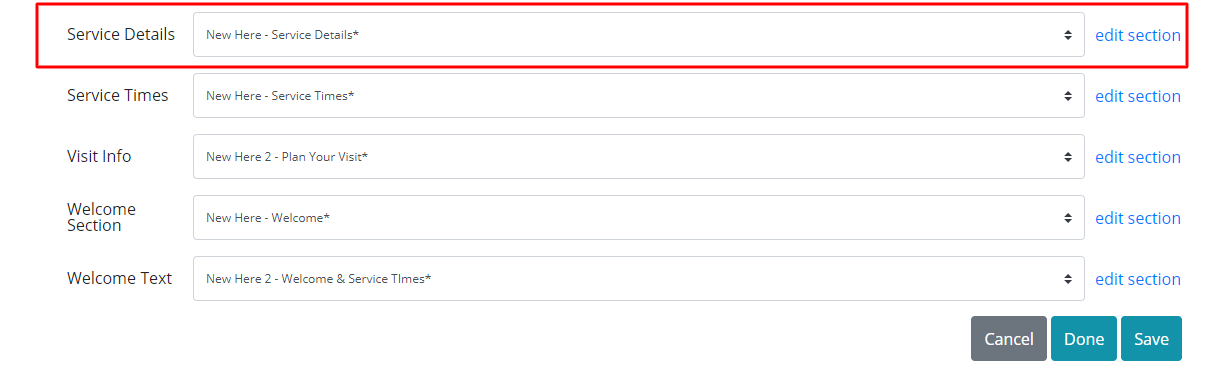
Welcome Section - Section
To edit the Welcome Section select "edit section" next to the label.

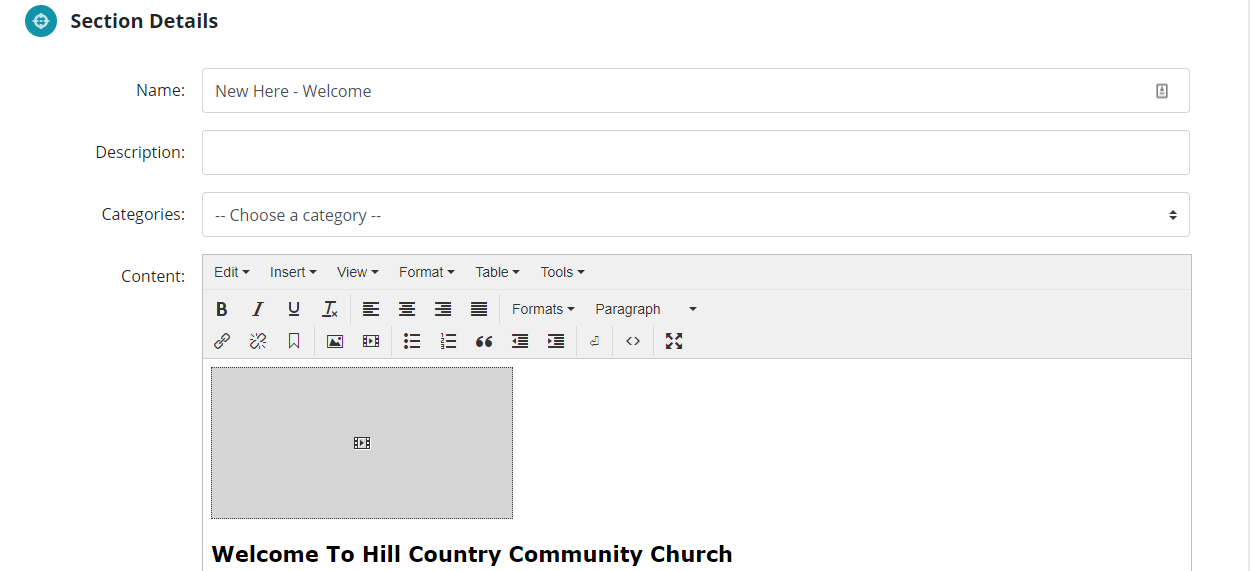
Editing the Section
You will be taken to another screen. You can choose to rename the Section in the Name field. Then you can type in your message in the Content field. The name of the Section will not appear as part of your content in this Section.
The placeholder content uses a two column style. You can add any type of media content like a video or image.
COLUMN 1: MEDIA
-
Add your video or image
-
Highlight the placeholder video
-
Select Insert > Insert/edit image or video
-
If your media file is already uploaded, find it in the source list
-
If you are embedding a video, paste your embed code.
COLUMN 2: TEXT
- Add your heading and welcome message
- Highlight and enter in the new text
Service Times - Section
This section allows you to display one or multiple services times and days.
- Edit the Welcome Text section by clicking “edit section” next to the “Welcome Text” label.
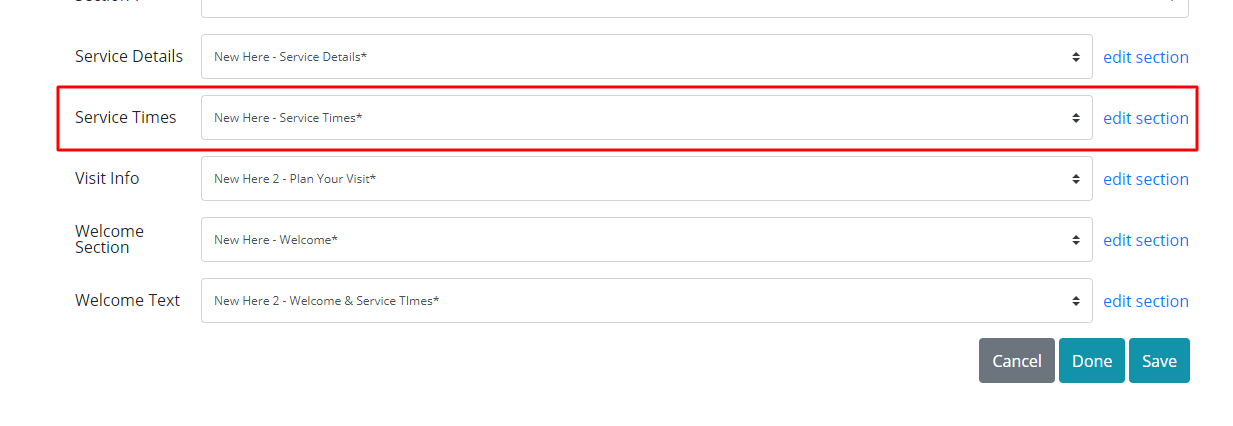
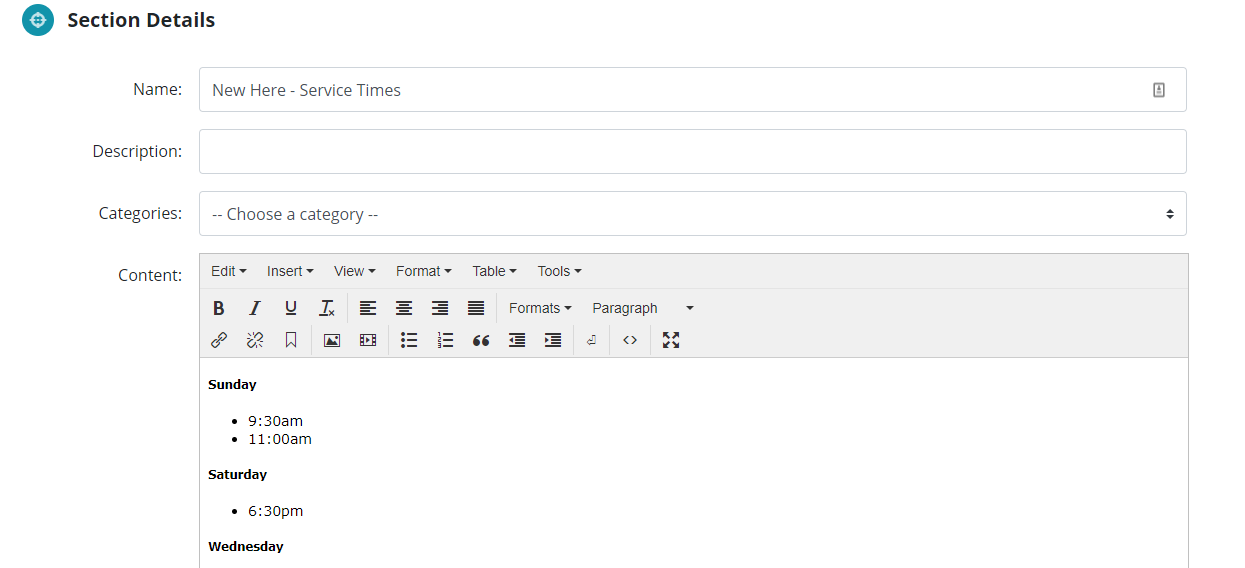
Editing the Section
1. Indicate the day of the service and list the time(s) below in a bullet format.
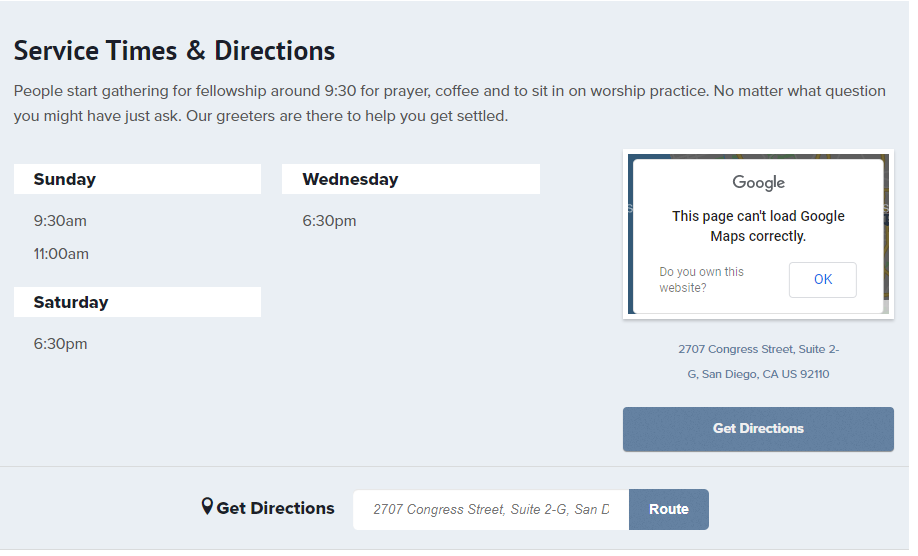
Service Details - Section
This section displays content above the service day & times.
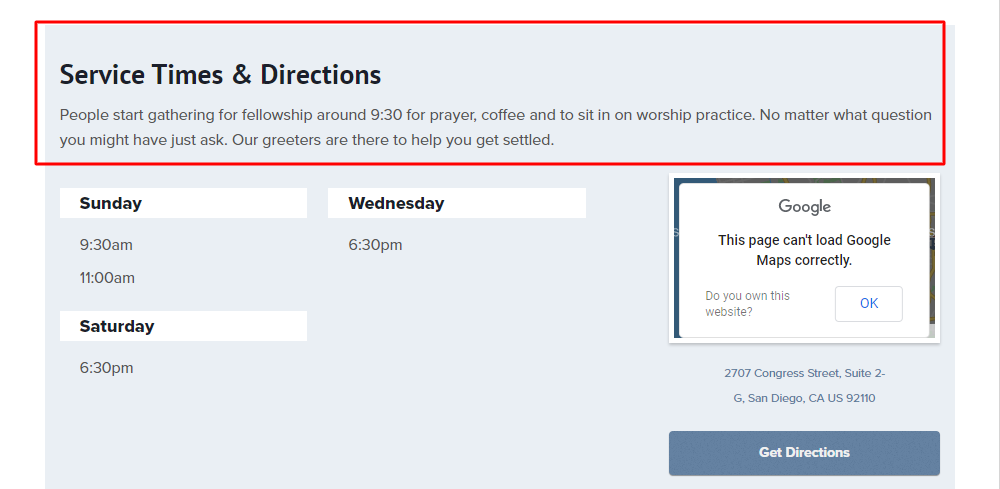
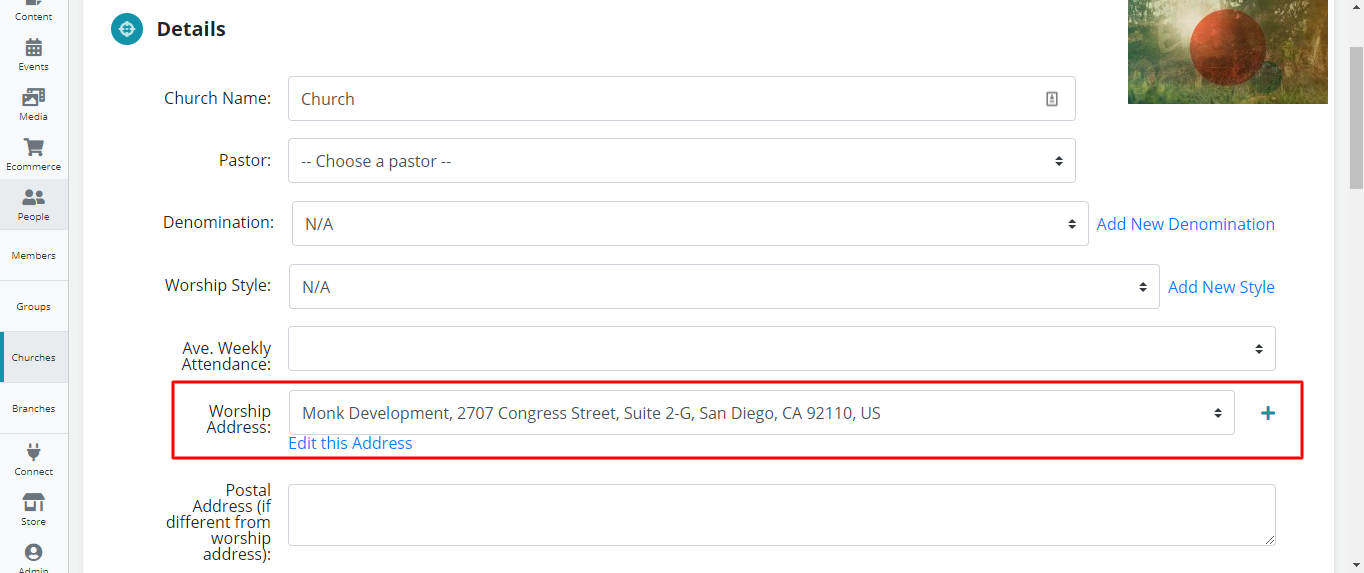
Map / Directions - Churches Module
The service times, map, and directions will display dynamically from the information in your Church Module.
- To edit the Map/Directions, go to: People > Churches and edit the “Worship Address” field with your Church address.
The location will auto generate a Google Map and allow site visitors to get directions.
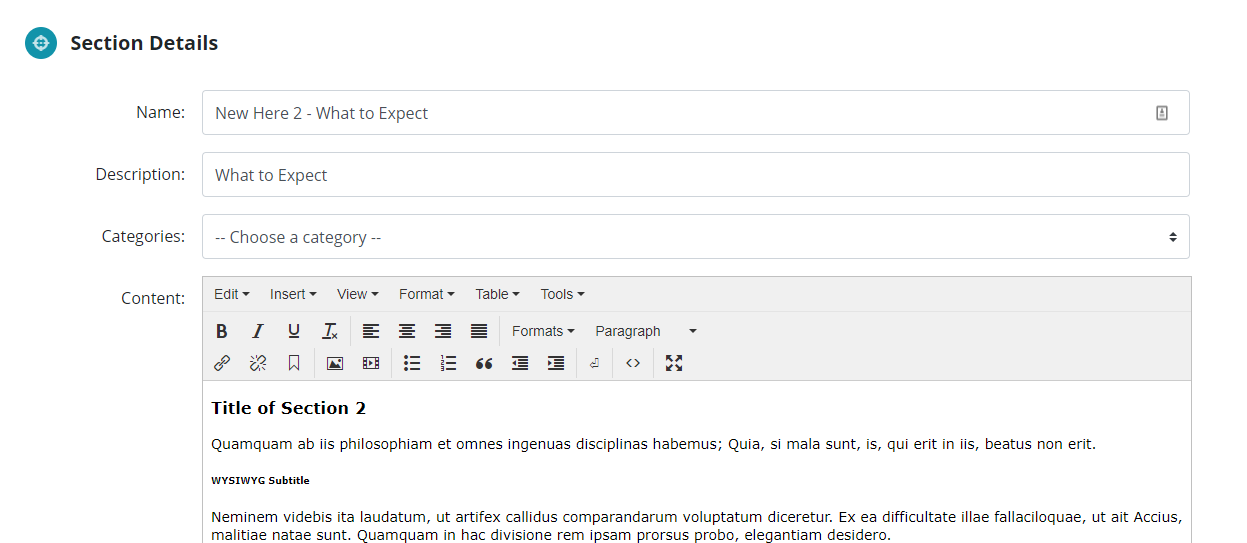
Expect - Section
You can edit the What to Expect Section by clicking “edit section” next to the “Expect” label.

Editing the Section
You will be taken to another screen. You can choose to rename the Section in the Name field. Then you can type in your message in the Content field. The name of the Section will not appear as part of your content in this Section.
This section uses a 3 column style with an image, text, and link.
-
Add an image or video
-
Highlight the placeholder media
-
Select insert > Insert image or video
-
If you have already uploaded the media file, locate it in the source list
-
If you are embedding a video, paste your embed code.
-
Add a headline title
-
Highlight and enter in the new text
-
Repeat the same process for the description
-
Add a CTA button link
-
Highlight the hyper linked text
-
Select the link icon
-
Select the page you want to link
-
Title the text you want to display
- Complete the rest of the fields
PRO-TIP: You can add another row to have 6 what to expect areas.
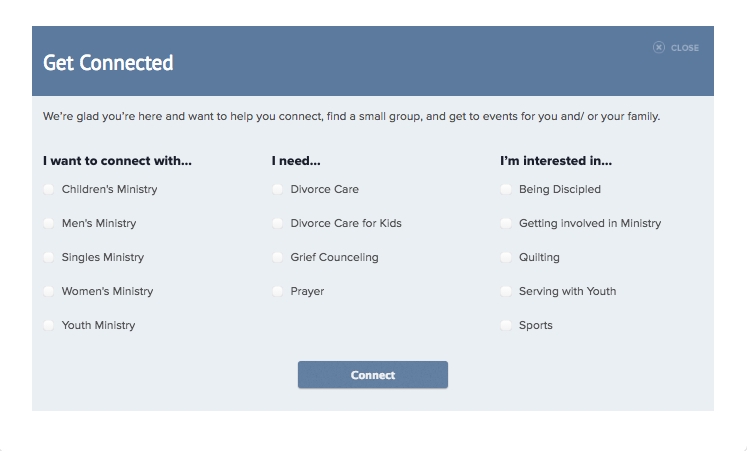
Connect Detail - Section
The “get connected” section displays check box options from different categorized articles and events.
- The first column displays all of the article subcategories from the parent category "New Here - Ministries" (be sure to create article content with that category)
- The second column is a mix of articles and events. But it pulls in the category labeled “New Here - Need” from both articles and events. Be sure to set up matching sub categories.
- The third column displays article subcategories from the parent category "New Here - Interested"
Alternate Section Option
If you do not want to utlize the "Get Connected" section, you can create and add your own section of content.
More info on creating and adding Sections can be found on our Help Site: http://help.ekklesia360.com/article/sections/
PRO-TIP: Create a form for first time visitors to fill out to let you know that they're visiting. Once you have created the form, place the Display Code in the new section you have created.
More info on creating Forms can be found on our Help Site: http://help.ekklesia360.com/article/creating-forms/
Finishing Up
Now that you’ve finished adding the content, you can place it in the navigation so people can easily find the layout.
More info on the navigation can be found on our Help Site: http://help.ekklesia360.com/article/adding-a-navigation-item/